TL;DR This guide shows you how to speed up WordPress using the W3 Total Cache plugin. You’ll learn why caching improves site performance, how to install and configure the plugin step by step, and how to verify speed improvements. Faster sites mean better user experience and higher Google rankings.
Why WordPress sites can be slow
WordPress is a prevalent content management system with thousands of extensions. The simplicity of extending WordPress with plugins and the maintenance of fairly long backward compatibility for extensions when releasing subsequent versions of WordPress has the negative consequence of placing a heavy load on the CPU and server memory.
This is why the generation times for WordPress-based pages – even on powerful servers – often exceed several hundred milliseconds. If you have extensive themes (templates) and a large number of extensions installed, then these times can surpass several seconds. It is worth knowing that times longer than 500ms are already felt by users (to the 500ms needed to generate a page by the web server, one must add the time needed to send it to the browser, display the content and enable the first interaction, e.g. scrolling the page or opening a link) and have a negative impact on the position in Google search results. It is therefore worth ensuring that WordPress-based sites generate faster.
How W3 Total Cache improves WordPress performance
A considerable reduction in page generation time can be achieved, for example, by appropriately configuring the “W3 Total Cache” plugin. Cache mechanisms are responsible for saving frequently used data to disk or memory and reading this data later. It is thanks to them that it is possible to speed up the generation of most pages to a few tens of milliseconds. As a result, the user is able to receive a page up to 100 times faster.
Installing W3 Total Cache
You can install the W3 Total Cache plugin in cPanel or directly in WordPress.
Installation via cPanel
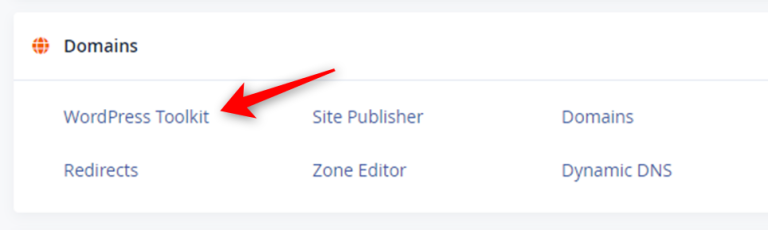
On the main page of cPanel, select “WordPress Toolkit”
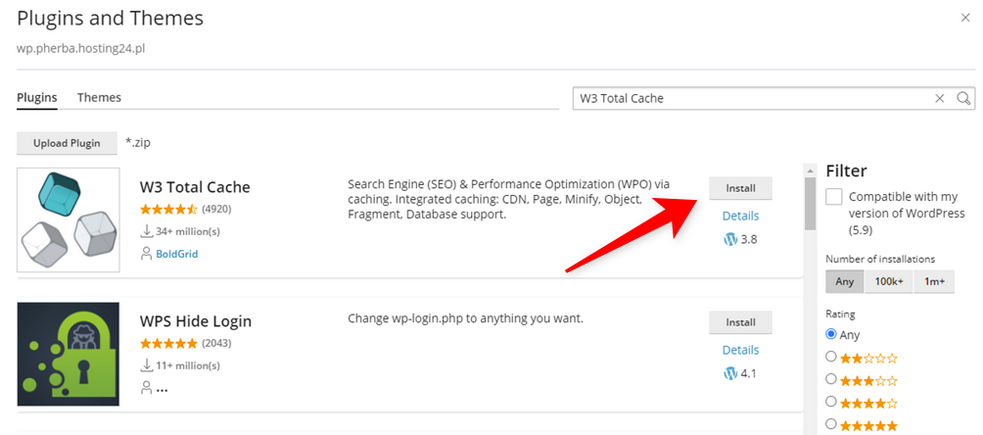
In the next step, click on the “Plugins” tab and on the “Install” button

Type “W3 Total Cache” in the search field and confirm with the Enter key. Once you have found the plugin, click on the “Install” button.
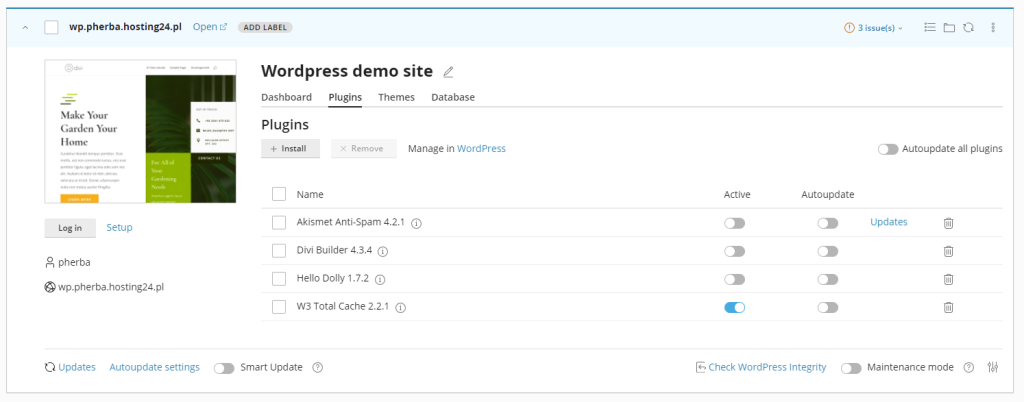
After installation, the plugin will be visible on the list
In order to configure the W3 Total Cache plugin, you now need to log into your WordPress admin panel and follow the steps described in section 3.
Installation via WordPress dashboard
You log in to the admin panel of your WordPress site, the login link is usually: https://mojastrona.pl/wp-admin
After logging in, in the menu on the left, click on the item “Plugins” and then on “Add new”.
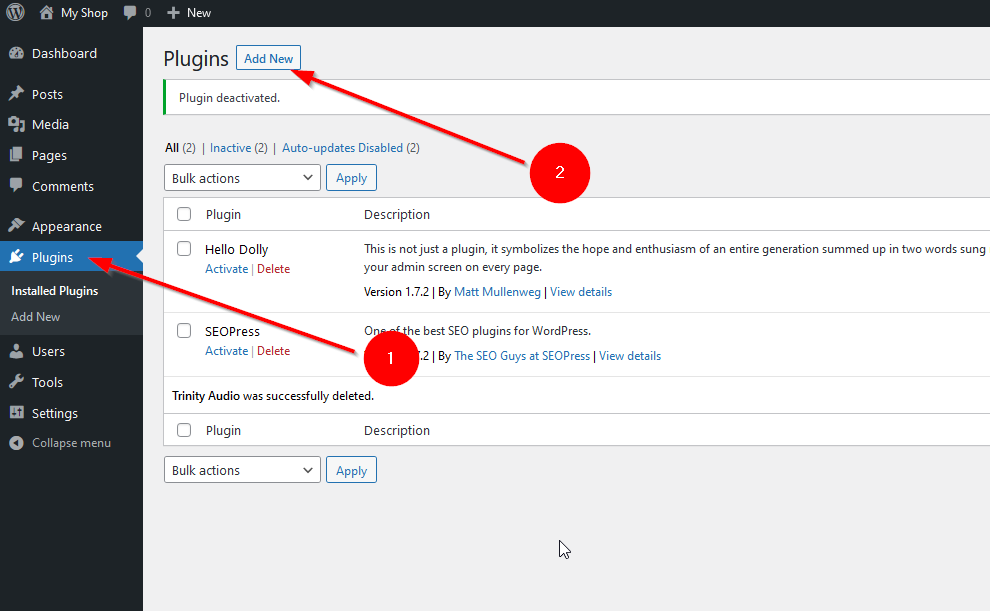
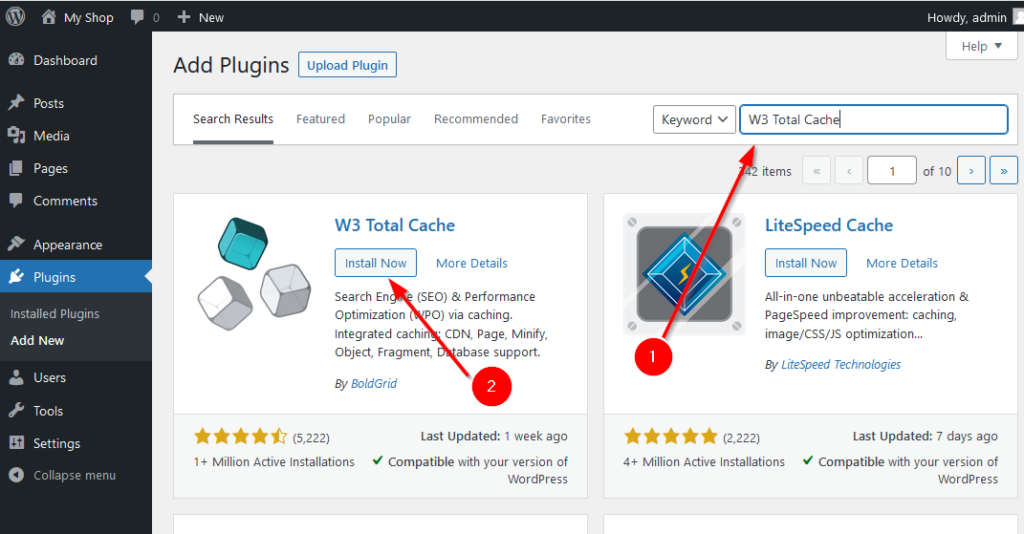
On the add plugins page, type the search term “W3 Total Cache” into the search engine on the right hand side, confirming it with the “Enter” key. Once you have found the “W3 Total Cache” plugin, click on the “Install” button visible on the tab for this plugin.
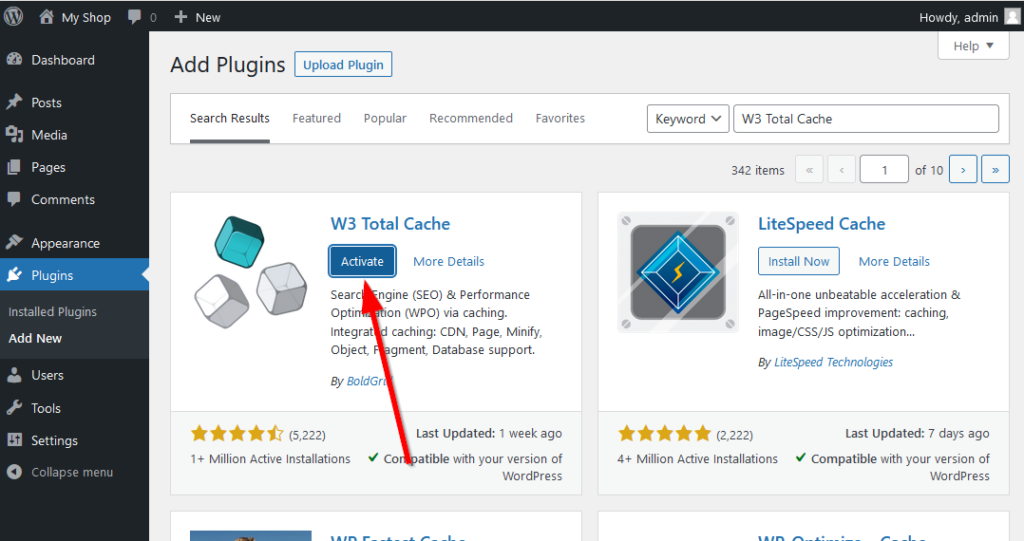
Once the plugin is installed, do not forget to press the “Enable” button – without this step, the “W3 Total Cache” extension will not work.
Configuring W3 Total Cache (step-by-step)
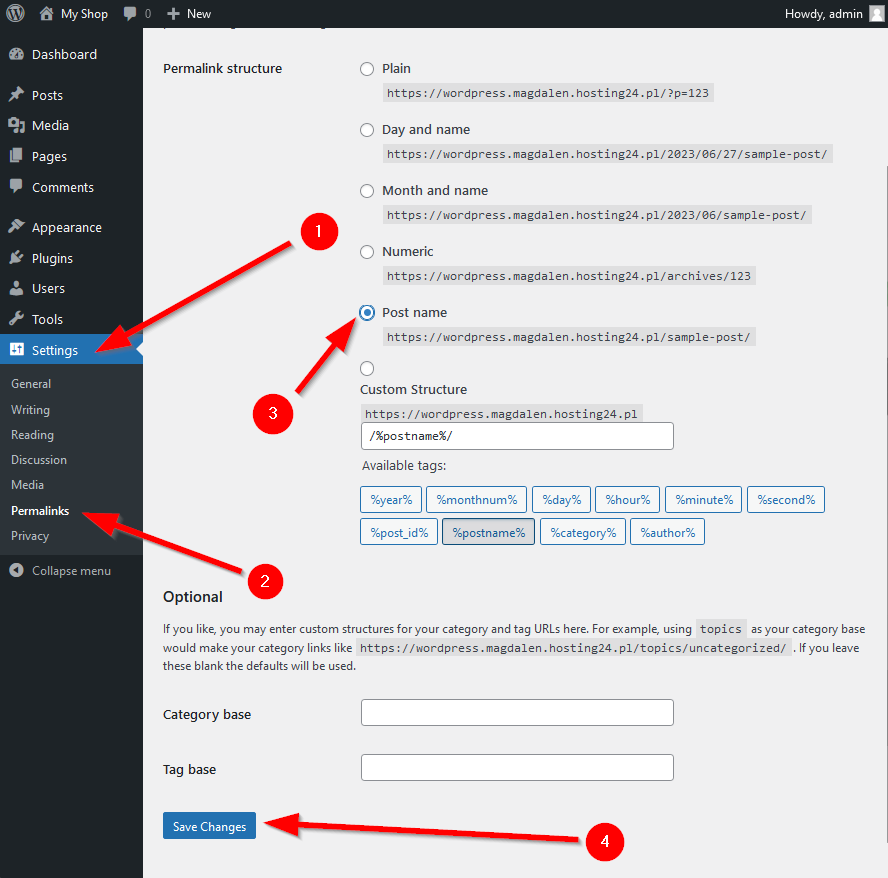
The W3 Total Cache plugin functions best on WordPress with direct links created from post names. Therefore, to ensure that this option is enabled, click on ‘Settings’ in the menu and then on “Direct Links”. Here, the “Entry name” option should be ticked – if it is not, tick it and save the changes.
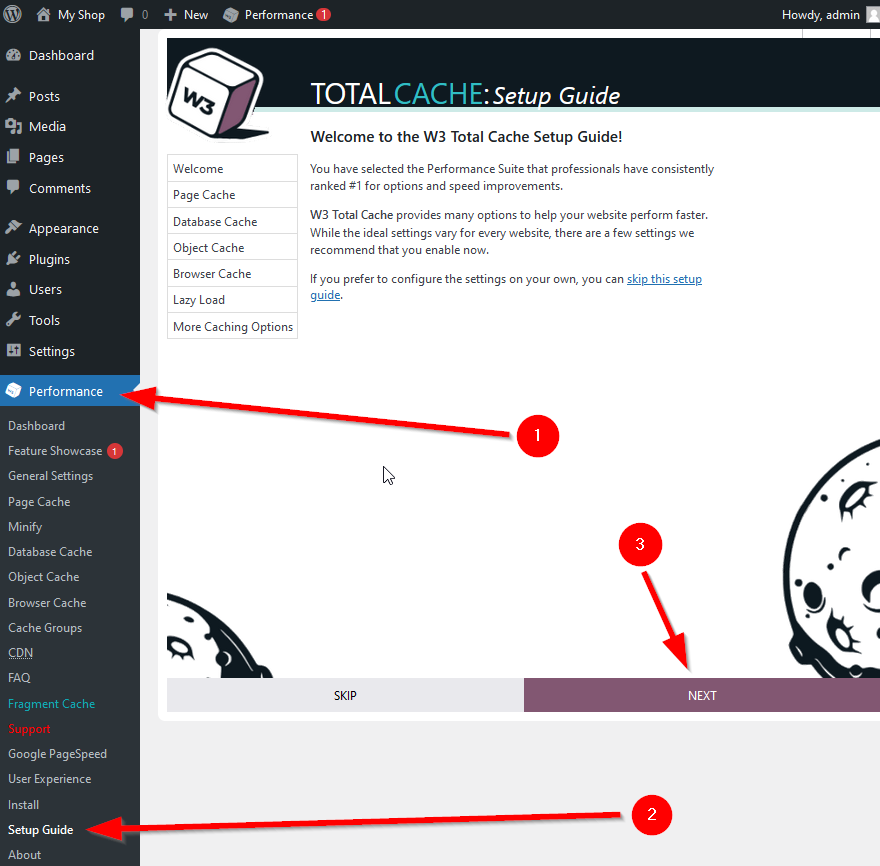
Once the plugin has been installed and enabled, you will see the “Performance” item in the left-hand menu. Click on it and then on “Setup Guide”.
On the first page of the configurator, click on the “Next” button.
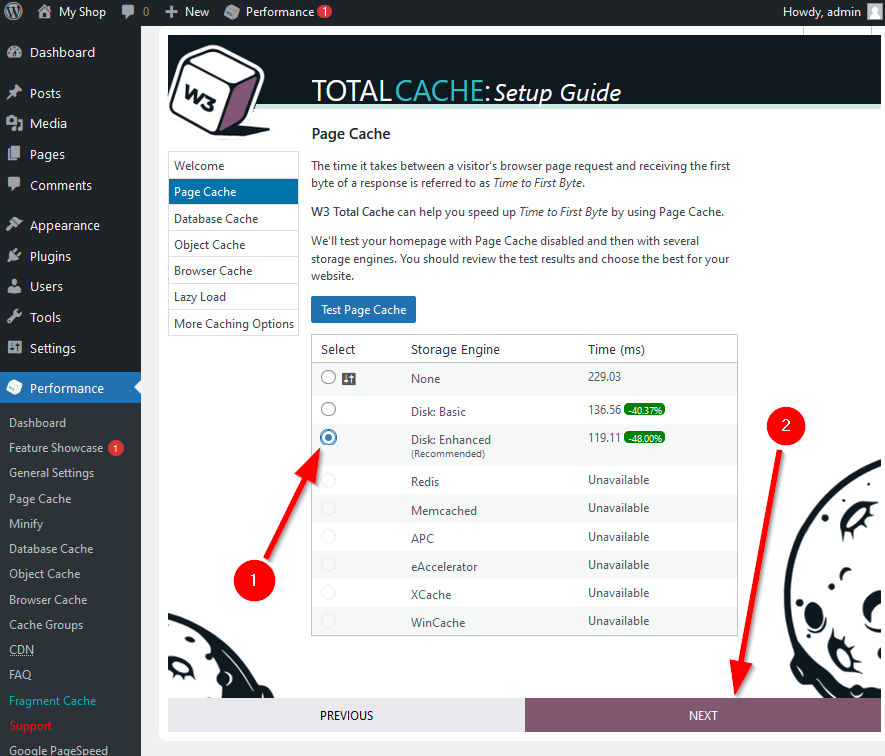
Step 1 – Page Cache
On the second page, select the mechanism for saving entire pages, whereby most pages will not be generated every time they are refreshed, but only when their content changes. This gives a very high speed of page loading because the server sends the previously generated page to the browser instead of creating it from scratch.

After clicking on the ‘Test Page Cache’ button, the plugin will test the TTFB times, i.e. the times from sending the request for an HTML document to receiving its first “chunk”. The test is carried out by using the available storage methods and will show the results in the form of a table. The smaller the time, the better. If the times differ by single milliseconds, the test can be run several times. The result is affected not only by the chosen data storage method but also by the server load, which can vary during the test execution.
Therefore, select the item that has the least amount of time and click on the “Next” button.
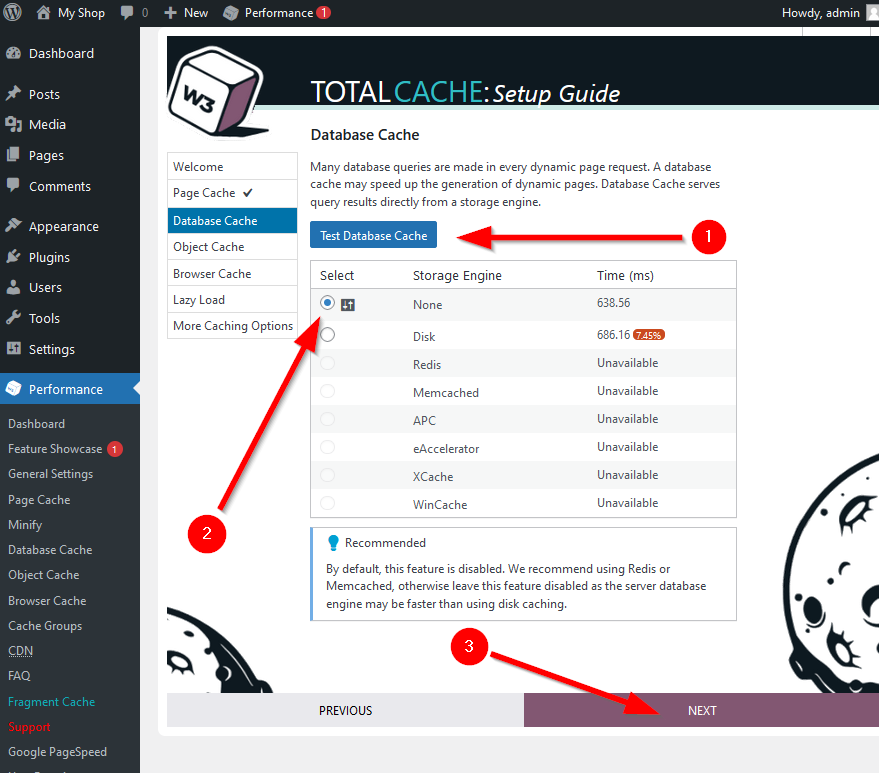
Step 2 – Database Cache
In the next step, we configure the mechanism for accelerating the retrieval of data from the database.
The mechanism is based on writing results from the database to the cache and later reading data no longer from the database, but from the cache. Sending a query to the database, receiving and processing the records is often slower than reading the data from the cache – this depends mainly on the query, the amount of data, the structure of the database, the presence of appropriate indexes and the load on the database process. In some cases, reading data from the cache can be thousands of times faster than from the database, but it also happens that the speed of retrieving data from the cache is comparable to the speed of retrieving data from the database (in the case of queries which the database returns very quickly).
To enable the database cache, click on “Test Database Cache”, choose the item that has the smallest value in the “Time (ms)” column and click on “Next”.
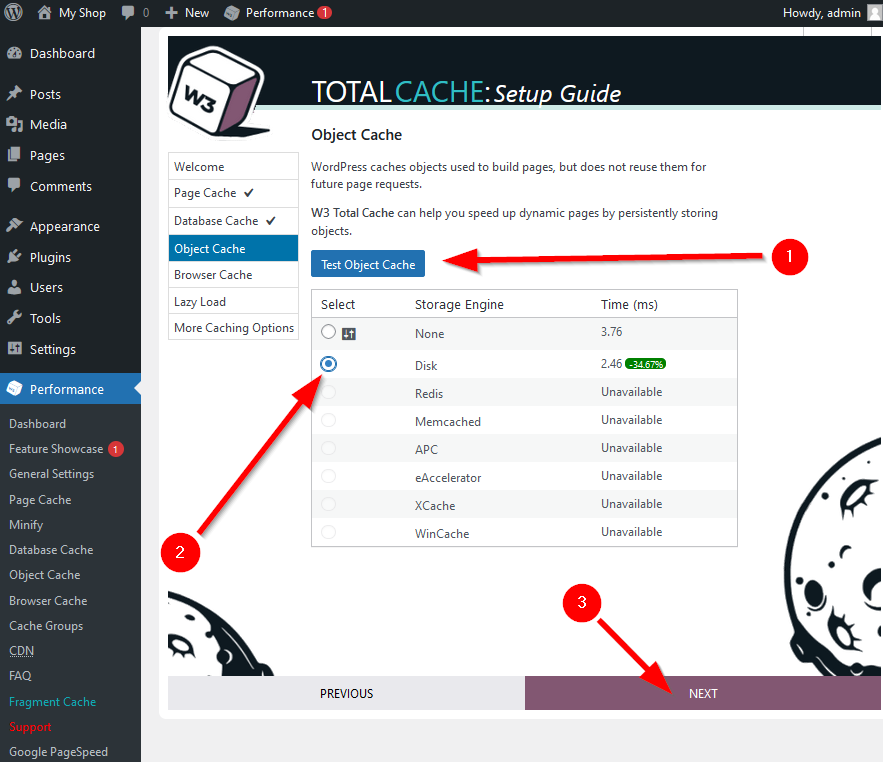
Step 3 – Object Cache
WordPress sites “consist” of collections of information that reside in a database and of objects, created from, among other things, data from the database. With each page view, the objects are created anew. The W3 Total Cache plugin allows previously created objects to be reused, thus saving the time needed to create them.
In this step, configure the object storage mechanism. Click on “Test Object Cache”, select the item with the smallest “Time (ms)” and click on “Next”.
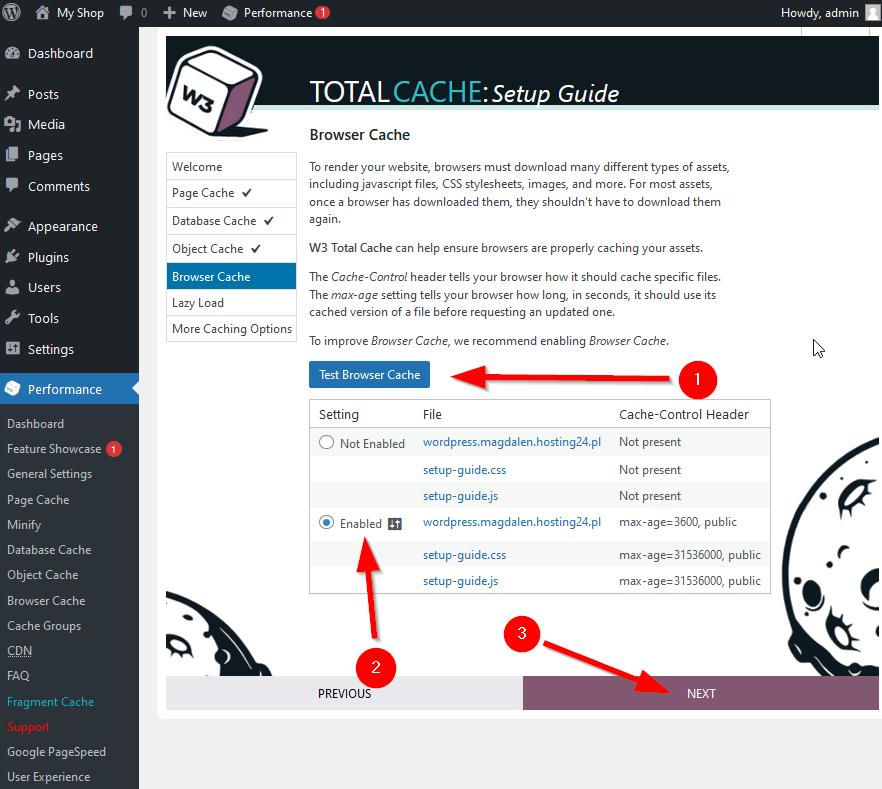
Step 4 – Browser cache
In this step, W3 Total Cache verifies that the server sets the appropriate cache headers when sending static resources (e.g. scripts, images, fonts) to the browser. This ensures that the browser loads these resources from our computer’s hard drive instead of from the internet the next time the page is viewed. The result of this is that the time required to view a page is significantly reduced.
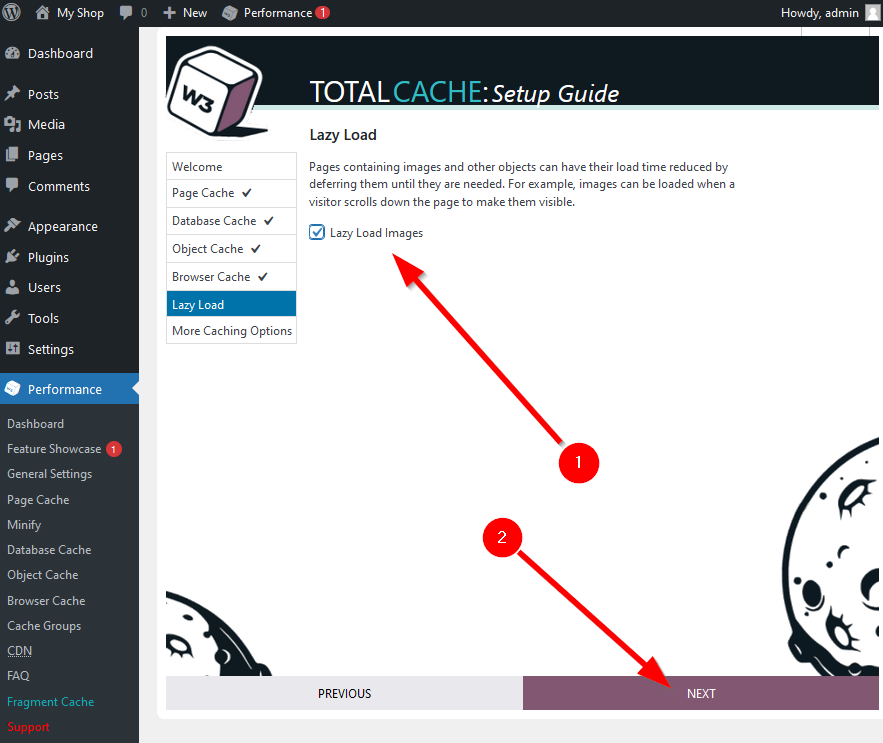
Step 5 – Lazy load
On pages with photos, the browser loads all photos – even those that are off-screen. This results in longer page loading times and increases the amount of data transferred.
By enabling “lazy loading”, photos that are outside the screen are not loaded. This reduces the amount of data transferred, which is important for those browsing the site on mobile devices outside of WiFi range.
Verifying WordPress speed improvements
Once the W3 Total Cache plugin has been configured, you can check if the plugin is working properly and the pages are generating faster.
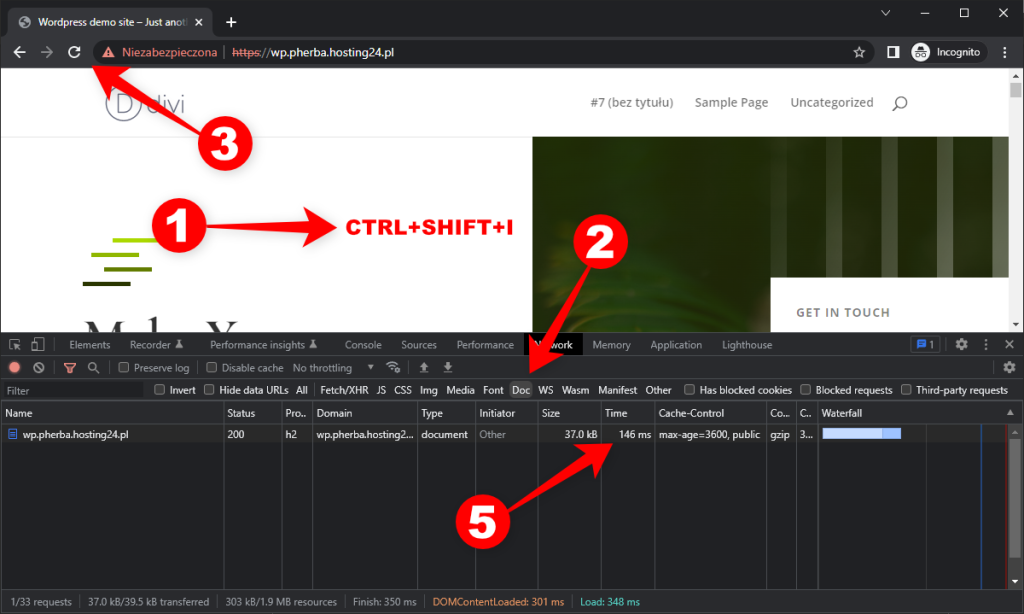
If you are using the Chrome browser – open a new window in “Incognito” mode and then press CTRL+SHIFT+I. A panel will open, in which you should click on the “Doc” item. Enter the address of the page and confirm with ENTER or refresh the page and a table will appear in the lower panel. The “Time” item is the time it takes to load and process the main document of the web page. In our case, it is 146ms.
Google recommends to keep page generation times below 200ms.
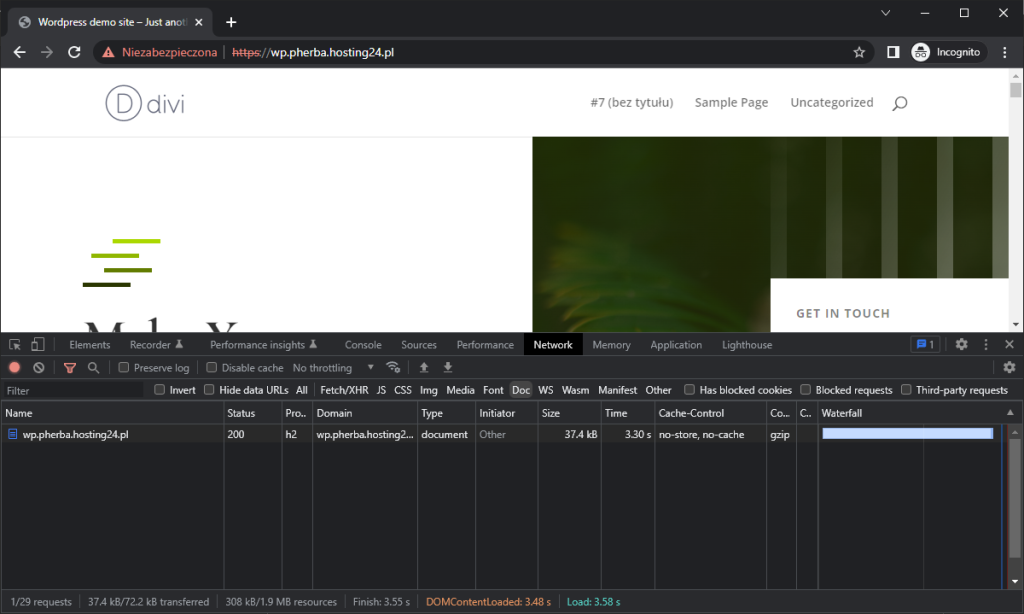
In the browser window, in the WordPress administration panel, select “Plugins”, then “Installed plugins” and disable the W3 Total Cache plugin.
Next, refresh the browser’s Incognito window and check the result again:
Summary
Once the W3 Total Cache plugin is disabled, the page generation and loading time increased in this case to 3300 ms, i.e. by more than 20 times. Remember to enable the W3 Total Cache plugin after completing this test.
Have you made use of the W3 Total Cache plugin? How many times have you managed to improve page generation and loading times? Tell us about it in the comments!
FAQ
1. What is W3 Total Cache?
It’s a popular WordPress caching plugin that improves site speed by storing static versions of your pages and reducing server load.
2. Is W3 Total Cache free?
Yes, the plugin is free, but it also offers a Pro version with advanced features like fragment caching and enhanced CDN support.
3. Does W3 Total Cache improve SEO?
Yes. Faster loading times improve Core Web Vitals and user experience, both of which are ranking factors for Google.
4. What is the best caching plugin for WordPress?
W3 Total Cache is one of the most popular options, but alternatives include WP Super Cache and WP Rocket.